
It’s been a long time since I’ve tinkered with my Raspberry Pi. I recently bought a new TF card and wanted to start messing around with it again, but I realized that since it’s been so long, I’d forgotten how to do a lot of the steps… It took me a while to figure things out, so I decided to write down these setup steps in this tutorial. That way, when memory prices drop and I want to set it up again, I can just follow along step by step.
(When will memory prices go down??! 😢)
Target Audience and Hardware Requirements
This guide is primarily intended for Headless Clean Start In this case, you only need to prepare the following basic hardware:
- One piece Raspberry Pi Motherboard and its SD Card :)
- One Personal Computer (PC) (As an affordable alternative to a screen and keyboard)
- Make sure the PC and Raspberry Pi are connected to On the same network (You can use either your home Wi-Fi or your phone’s hotspot.)
We Not at all necessary All sorts of odd peripherals, like a separate monitor, a dedicated mouse and keyboard, and a Micro HDMI cable.
As for the one at the very front, System Image Installation The official installer has been updated and improved compared to the previous version; the steps are pretty much the same and fairly straightforward. Just search online for the latest tutorial.
First, let’s get the core software we’ll be using ready: VNC Viewer software
Note : When flashing the system, Be sure to remember the username and password you set. ...This is very important! If you accidentally forget it, debugging via remote connection later on will be a real pain :)...
1. Enable the VNC Server
In your current SSH terminal, we need to use the official configuration tool to start the service.
Step 1: Go to the Interface Options
- Uses : Open the Raspberry Pi system configuration tool and locate the VNC settings.
- Note : Enter the following command and press Enter to proceed
raspi-configAdministration Interface:Use the up and down arrow keys on the keyboard to selectsudo raspi-config3 Interface Options(Interface options), press Enter.
Step 2: Start the service
- Uses : Enable the internal VNC server.
- Note : Found
I3 VNCThen press Enter. The system will ask, “Would you like the VNC Server to be enabled?” Be sure to select<Yes>. After seeing the message confirming that it has been successfully enabled, press Enter to confirm.
2. VNC “Blank Screen” Issue
Switch Display Servers
- Uses : Resolves the issue where the screen goes blank after establishing a VNC connection in the new system version, leaving only the right-click menu visible.
- Note : The reason is that the new version of the system uses the Wayland display server by default, and VNC does not yet fully support it. We need to
sudo raspi-configSwitch back in Advanced OptionsX11。During this test, the relevant options were located at
A7 Wayland(Version numbers may vary; please locate the relevant section on your own.)
Detailed Step-by-Step Instructions with Photos: Solution for a Blank Screen on the Raspberry Pi 4 When Using VNC
3. Get IP Address (Get IP)
To connect to VNC, you need to tell it who to connect to. Here are two different ways to do that:
Option 1: Obtain Your Real IP Address
- Uses : The most stable and reliable direct connection method.
- Note : The green text prompt right next to you
pi@raspberrypi:~ $After that, type this command and press Enter (Note: The option is a capital letterI(, IP address):The system will obediently display the Raspberry Pi’s actual IP address (usuallyhostname -I192.168.0.xxx(another number from there). Simply enter the new string of numbers that appears in the Address field of the VNC Viewer on the right.
Option 2: Direct Connection via Hostname
(I don’t think anyone would want to look up that boring string of IP addresses above, right?)
- Uses : No more hassle of remembering IP addresses.
- Note : If you were previously using
ssh pi@raspberrypisuch as (various names set during burning) are connected, which means your局域网/路由器That’s smart—you recognize that name. You can delete the IP address from the “Address” field in VNC Viewer and enter the Raspberry Pi’s name directly.raspberrypi。FAQ: Why doesn’t raspberrypi.local seem to work? Featuring
.localDomain names with this suffix rely on the LAN’s mDNS (Multicast DNS) service. If your router blocks multicast packets, or if your operating system isn’t running an mDNS resolution service such as Bonjour, resolution will fail. In that case, simply useraspberrypiAlternatively, reverting to “Option 1” and using a numeric IP address is the safest approach.
4. What should I do if I forget my password or username? (Troubleshooting)
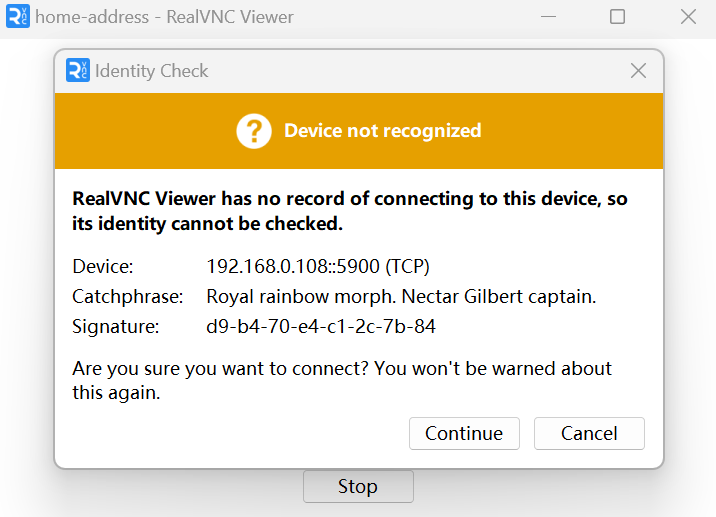
If the VNC pop-up AuthenticationIf you can’t connect in the (Authentication) box no matter what you try, it’s most likely because you didn’t enter the credentials correctly.
Step 1: Correct the username (Username)
Uses : Restore the correct login identity and distinguish between “username” and “machine name.”
Note : First, it’s important to note that these two fields in VNC Viewer are fundamentally different:
- Address (Address): This is the location of the machine, which is the IP address we just obtained, or
raspberrypi。 - Username (Username): This is your actual “name,” which is used in conjunction with your password for authentication.
- Take a look at the black SSH terminal and see if the green text at the beginning of each line says something like
pi@raspberrypi? Here,@Just like “at” in English. In other words, you are namedpiA user logged in to a site namedraspberrypion the machine. - Common Misconceptions : Many people tend to use the machine name (
raspberrypi) I filled it outUsername(Name) position. When the system checks, it finds that there is no one by that name, so naturally, it won’t let you in. - Operations : Delete the incorrect username in the VNC pop-up window and replace it with your actual username (for example, it is usually
pi)。
- Address (Address): This is the location of the machine, which is the IP address we just obtained, or
Force a Password Change (Change Password)
- Uses : If you really do forget your password, force a password reset.
- Note : Since you’re already in the SSH terminal, we can use a command to change the password directly.After running this command, enter the new password twice as prompted. Linux’s anti-peeping mechanism will take effect here (the screen will not display any asterisks or characters while you type); once you have typed the password blindly, press Enter. After the password has been successfully changed, log in to VNC using the new password.
passwd
Have fun~
Appendix: Quick Tips for the Linux Terminal
If this is your first time using a black terminal window, there’s a good chance you’ll be annoyed by these two “classic pitfalls”:
1. Why Ctrl+C Can’t copy it?
In the Linux terminal, the keyboard shortcuts are slightly different from those in Windows:
- Copy:
Ctrl + Shift + C - Paste:
Ctrl + Shift + V
Remember : In the world of Linux, a typical
Ctrl+CEntrusted with an extremely sacred mission— “Emergency Stop” (Forcibly terminates the currently running program). Be careful not to press this by mistake and accidentally kill an important process that’s currently running!
2. Issues that occur when pasting code ^[[200~ What the heck is garbled text?
Sometimes, when you paste the code you want into the terminal, extra characters mysteriously appear at the beginning and end. ^[[200~ and ~ This garbled text. This is because the system is set to enabled by default. Bracketed Paste Mode , which caused it to add a border around it.
The way to break this spell is simple:
- Type the following command in the terminal:(This will call a function named
nano ~/.inputrcnano(a minimalist text editor used to open or create a terminal configuration file) - Type this line of magic code into it:
set enable-bracketed-paste off - Press
Ctrl + O(Note: it’s the letter O), then press Enter to save. - Press
Ctrl + XExit Notepad. - Finally, close the SSH terminal in this black window and reconnect—the garbled text problem will disappear for good! But remember not to copy any commands you don’t understand~